Cleaning a toilet tank is an important task that should be done regularly to ensure the proper functioning of the toilet and to prevent unsanitary conditions. Buildup and rust can accumulate in the tank over time, causing the toilet to flush poorly and potentially causing leaks. In this article, we will provide a step-by-step guide on how to clean buildup and rust from the inside of a toilet tank.
Step 1: Gather Supplies
Before you begin, gather the following supplies:
Step 2: Turn off the Water Supply
To prevent water from entering the tank while you are cleaning it, turn off the water supply to the toilet by turning the valve located behind the toilet in a clockwise direction. Once the water supply is off, flush the toilet to drain any remaining water from the tank.
Step 3: Empty the Tank
Remove the tank lid and use a towel or rag to wipe out any excess water that may be remaining in the tank. Next, use a bucket to scoop out as much water as possible from the tank. This will make it easier to clean and will prevent water from splashing out of the tank while you are cleaning it.
Step 4: Apply Toilet Tank Cleaner
Spray the inside of the tank with a toilet tank cleaner or, if you prefer, you can use a mixture of white vinegar and water. Be sure to coat the entire inside of the tank, including the bottom and sides. Let the cleaner sit for at least 15 minutes to allow it to work on breaking down the buildup and rust.
Step 5: Scrub the Tank
Using a toilet brush or scrub brush, scrub the inside of the tank to remove the buildup and rust. Pay special attention to areas where rust and buildup are most prevalent. If necessary, use steel wool to scrub away particularly stubborn areas. Be sure to scrub the entire inside of the tank, including the bottom and sides.
Step 6: Rinse the Tank
After scrubbing the tank, rinse it thoroughly with water to remove any remaining cleaner or debris. Use a towel or rag to wipe out any excess water.
Step 7: Reassemble the Tank
Once the tank is clean and dry, reassemble it by replacing the tank lid and turning the water supply back on by turning the valve located behind the toilet in a counter-clockwise direction. Flush the toilet several times to refill the tank with water and check for any leaks.
Step 8: Clean the Exterior of the Tank
Finally, clean the exterior of the tank with a damp cloth or sponge to remove any dirt or stains.
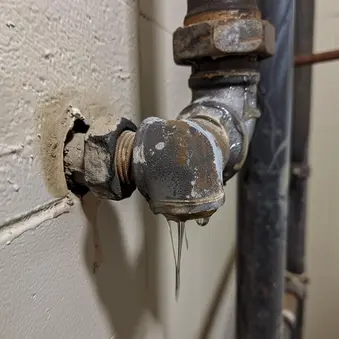
By following these steps, you can effectively clean the buildup and rust from the inside of your toilet tank and ensure that your toilet is functioning properly. It's recommended to repeat this process every 6 months to a year to maintain a clean and sanitized toilet tank. Remember to wear gloves and work in a well-ventilated area, and if you find any leaks, it's best to consult a plumber.
The B.L. James & Son team likes to move quick and reply to customer inquiries the same business day. Once we troubleshoot the issue, estimates are provided the same day or by the end of the next day. Our work begins the moment you call, and since we’re open 24 hours a day there’s no reason to wait. Call B.L. James & Son anytime, we’ll be there to help.

Email has an ability many channels don’t:
creating valuable, personal touches – at scale

B.L. James & Son Is a veteran-owned mechanical contractor providing plumbing, heating and cooling services to residents and business in Arlington, Virginia and the surrounding community.